
The Complete Pre-Grow Checklist for a Fantastic Cannabis Harvest
Smoking a joint with home grown weed is a difficult feeling to describe. There is a sense of pride and achievement in every move.
You know the entire history of this particular plant – every phase of its development. You are essentially smoking “time” compressed into a single instance. All the care, all the patience, all the discipline that gets into your bloodstream from the smoke of your home-grown buds.
Wonderful!
I recently bred a few different strains, sexed two Gorilla Glue strains for semen, and went through the entire curing process. The last batch wasn’t what I was expecting, but it delivered the results I was looking for.
Now – I’m growing in between, about to renovate the house I want to buy and prepare for my summer harvest.
While I take the time to gather my thoughts, I’ll be walking you through my pre-grow checklist to make sure I have everything I need to guarantee a perfect harvest this October.
Choo Choo! My pre-grown train of thought!
Before I start growing, I first think about my big vision. What do I want to achieve? The last cycle of growth was my “winter balcony bud”. The experiment was: “Can I still grow outdoors during the winter season?”
Based on my “unknown geographic location” – the weather allows for quick harvests. Essentially, the plant will grow for about a month and a half and naturally begin to enter the flowering phase. You can’t make big harvests – but you can do them consistently.
My winter goal has been achieved. By the time you come this winter I will know exactly how to plan my grow for maximum bud cycle and protect the plants from the elements.
This time I wonder if I should do an indoor grow or use the balcony space more efficiently.
If I wanted to grow outside, I would have to compensate for the extreme heat my location is exposed to. This means coming up with a solid watering plan, maybe building shade for the plants and artificial ventilation to encourage the wind when none is around.
If I need to build an external structure to protect the plants from the elements – I’d rather build something inside so I can control the elements. I have the space and will be making some structural changes to the house – so all of this is important to consider.
Why is it important to have the ultimate goal in mind? Because based on what you want to achieve, you can properly prepare to be most efficient.
This time, my goal is simple – to cut out MOST what I can from a single strain – also known as Gorilla Glue. I will be using shwazzing as my main method to increase yield.
I’m still not sure if I want to do hydroponics or soil – especially since there have been occasional blackouts in my neighborhood. In this heat and with hydroponics – that would mean instant death.
And so I decide to grow in the ground as an “insurance policy”. I might even decide to build an indoor grow area – depending on what I do with the home renovations.
Once you’ve set the end goal – get the basics!
Every grow has a few staples that you will always need. These things go as follows;
-
pH meter – to check the acidity of your water.
-
Grow Medium – depending on whether you are using soil or hydro or another variant
-
Extra nutrients – depending on how you are preparing your soil, you will need some extra nutrients. This can be achieved either through extraction from natural sources like – banana for potassium – or through store-bought solutions.
-
container
-
lighting
-
Fans
-
Automatic timer (if you are growing indoors)
-
Breeder’s Journal
-
Cleaning materials (bleach, mops, etc.)
-
Pesticides – It is always good to prepare for potential pests. This includes dichotomous soil, natural fungicides and pesticides, or your own home remedies.
-
seed
Regardless of the type of grow you want to create, whether it’s a cabinet grow or something larger, you’ll need a variation on what I listed above.
Create a schedule – follow the discipline
It is important to keep your logs in place. For example, I like to observe my plants up close once or twice a day. I just scan the sheet, look for pests, and take action before it gets too difficult.
This way you will mitigate any problems before they become too unbearable. But that also takes time, so I have to plan how to go about it – how long? Once you’ve designed something to commit to – there is only one thing left to do … start growing!
Of course – some growers will tell you “dude – just plant the seed and see where it goes” and I 100% agree with them. If it’s your first grow!
If you’ve never had a fully successful harvest, don’t worry about the precision of your grow. You’re sure to screw something up.
That’s fine – this is how you become a better breeder and separate those who are serious from those who are just “new breeders”.
However, once you’ve had multiple successful harvests and are looking to perfect your growing game, these changes become a necessity. You will need a diary to keep data, weight and height measurements, lighting plans, etc.
This will help you become a better breeder by creating records that can be improved. All you have to do is adopt the discipline of a master breeder. It’s not always easy – but the only way to improve your game is when you feel like you’ve hit a wall.
The sticky end result
To summarize everything;
-
First, understand your end goal. Dream backwards. What do you want to achieve and then plan accordingly.
-
Get as much basic material as you can in advance.
-
Organize your space
-
Organize your schedule
-
To grow!
It really isn’t more “complicated” – but here, too, every point could be explained in great detail.
GROW CANNABIS IDEAS BEFORE, READ MORE …
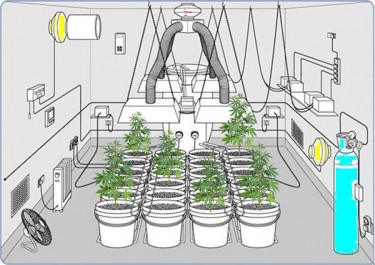
FIRST GROW ROOM SETUP? SEE OUR TIPS HERE!
OR..

INDOOR MARIJUANA GROWING BASICS, HOW TO START?
Post a comment: